by Jim Linnell
When I was starting out, something I wish that somebody had told me is how to hold stamping tools when you’re doing pear shading and beveling and such.
In fact, when I was first learning to do leatherwork, I watched somebody give a quick demo on how to use the pear shading tool. It looked like it just scooted along the leather and it left this really nice, shaded in, burnished kind of an area. When I tried it, it didn’t come out anything like that. It looked like somebody had taken a hammer to it and just beat it up. The trick actually is in how you hold the tool.
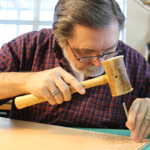
When I’m using stamping tools, it may look like I’m sliding the tool along as I use it, but that’s not what’s going on at all. When I hold these tools, I’m actually holding it with a pretty tight grip. I’m holding it so that the thumb’s on one side, all the other fingers hold it, and I actually have my ring finger resting on the leather. The tool, when I hold it, is hovering just on the surface of the leather a little bit.
When using a tight grip, the tool will bounce back up off of the leather after striking it. That’s what’s actually happening when you see me walk it along. I’m holding it so that it’s just barely touching the leather, but I’m holding it with that same tight grip so that when you tap this tool, it bounces back up. It’s sitting on top of the leather, rather than sitting in a hole in the leather created by the previous impression. When I walk the tool along, it’s ready to just kind of bounce along to the next impression.
When I use these leather stamping tools, it doesn’t move much at all between each tap of the mallet. I’m overlapping these impressions at least a good 2/3 of the width of the tool. That’s how you get it to come out nice and smooth without looking like somebody took a hammer to it. Then, if you’ve got the right moisture content in your leather, you get this really rich burnish. You get this nice color that comes out of your leather.
All of that comes from learning how to walk these tools. Learning how to grip the tools is so critical to making them work right. That’s one of the things I wish somebody had taken the time to show me how to do correctly. Learning how to actually make these tools work the way they’re intended will sure make your leatherwork comes out a lot smoother and a lot cleaner. This technique is the same for the pear shader, the beveler, and a number of other stamping tools.
You just gotta work at it. Again, the other thing is practice, practice, practice. I’ll say that a lot, but that’s really an important thing to do. Get after it. Give these tools a try and practice ’til you get them working smoothly for yourself.
Learn more about this and other beginner techniques in the video “Leathercraft Tips for Beginners with Jim Linnell”
 Born and raised on a ranch in eastern Montana, Jim Linnell has had leatherworking in his blood ever since his first visit to the Miles City Saddlery. The sounds and smells of those visits are some of the most vivid memories he has of that early introduction to the leatherworking world. Now, after spending the last 47 years working with leather, those sounds and smells are still a part of his life. Jim has conducted classes or workshops on leatherworking in 42 states, including Alaska and Hawaii. He has also taught in Canada, England, Norway, France, Spain, and Puerto Rico. Jim’s leather art has been featured on magazine covers, catalog covers, in galleries and at countless shows. In the leatherworking world, he has received some of the most prestigious of their awards. The Al Stohlman Award, the Lifetime Achievement Award, and the Master Leather Artisan award from the Academy of Western Artists are some of the better known. Find out more by visiting elktracksstudio.com.


