How to Attach a Belt Buckle to a Leather Belt: Beginner's Guide

It's time to create a leather belt that screams "you" and fortunately, you're in the right place!
Let's put your leatherworking skills to the test and create a belt that's as unique as you are. Before you start envisioning yourself as the next great belt designer, you'll need to know how to attach a belt buckle to your leather masterpiece.
Luckily, this beginner's guide has all the tips and tricks you need to buckle down and create a belt that'll turn heads. Get ready to rock that DIY leather belt like a pro!
What Is A Belt Blank?
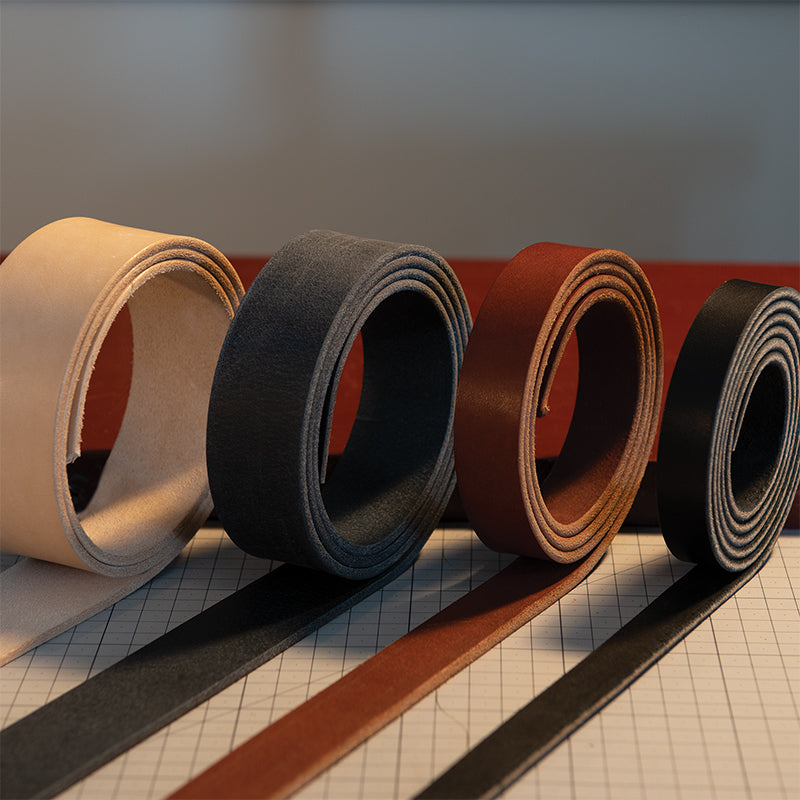
Before we dive into the nitty-gritty of attaching a belt buckle, let's define what a belt blank is.
A belt blank is a pre-cut strip of leather that eliminates the need to cut your own belt strap. Depending on the style you select, it may feature pre-punched holes for rivets, an oblong shape, and edge paint to give it a clean finish. The back of the blank is also skived, making it easier to bend when attaching a buckle.
When you're shopping for the ultimate belt blank that will set your next project up for success, make sure you pay close attention to the width.
The standard belt width is 1 ½ inches, but it's most important that you make sure your belt blank and buckle match in width. For a durable and high-quality belt blank, we recommend using Weaver Leather Supply.
Our solid leather can withstand a lot of wear and tear while still looking brand new.
And that's it! Now that you have your belt blank, it's time to choose the right buckle.
The Right Buckle Chooses You
Just like the leather belt blank, you want to make sure you get the right width and style to match both your belt blank and preferred style.
The two most common types of buckles are the heel bar and center bar buckles. The heel bar buckle requires a belt keeper, while the center bar buckle doesn't need one since the buckle itself serves as a keeper.
If neither one of these sounds like the right fit, you can also try a trophy buckle, buckle sets, or a Conway buckle on for size. Design matters even if you're not a fashionista so you want to make sure the two pieces complement each other and create a cohesive look.
Attaching a Heel Bar Buckle

Let's Get Specific:
Attaching a heel bar buckle to a leather belt blank can seem daunting, but with the right steps, it's a simple process.
Here's a step-by-step guide to help you:
Step 1
Begin by sliding the matching keeper onto the blank. Then, from the bottom of the leather blank, insert the prong of the heel bar buckle and slide it through the oblong hole.
Step 2

The next step is to use a Chicago screw, which is a threaded rivet, to attach the buckle. For this process, all you need is a screwdriver. To make it easy to change the buckle if needed, we suggest using a small dab of white glue.
With the female side of the Chicago screw facing up, insert it into the hole closest to the buckle. Then, flip the belt over and push the extra end of the leather belt blank down. Drop in the male piece of the screw and screw it in.
Step 3
Afterward, scoot the keeper closer to the previously inserted screw. If you have a center bar buckle, there's no need to use a keeper during this process. Now, simply move the buckle to the end of the table and push the male end of the second screw up through the bottom of the leather blank until you see the end popping up through the hole at the top.
By following these simple steps, you'll be able to attach a heel bar buckle (and any other buckle for that matter!) to a leather belt blank like a pro.
Comfortable Is Best In The World Of Belts
After your buckle is attached, add the perfect size holes to the belt to ensure a secure fit. First things first, know your waist size. And don't worry, this isn't a size zero runway show, we're all about embracing our curves!
1. Measuring Your Waist Size
There are two ways to measure your waist size. The first is to grab a belt that you wear often and look for the hole that has the most wear and tear on it. Then, measure from the bend back to the hole to get your waist size.
The second way is to use a tape measure and measure around your waist. Simple as that!
2. Setting Your Size Holes
Now that you know your waist size, it's time to set the size holes. Measure right from the bend back and take your straight edge (or tape), then mark the belt right at where you measured. We suggest measuring 1-¼ inch between the holes to give you a little extra room to go inside in case you lose some weight. And let's be honest, we all have those days where we feel a little bloated!
Add as many holes inside or outside of your usual measurement as you'd like, but we recommend 5 holes total; one inside your usual measurement and the other 3 outside. Grab a high-quality revolving punch to get holes that come out crisp, clean, and professional-looking.
3. English Point Belt Tip Punch

The last thing you need to do is come out 3 inches from your last hole and mark your leather. Then, use an English point punch to cut your belt. If you don't have one, don't sweat it!
You can take your strap, put a little mark right in the center, and use a circular edge to scribe in two lines on the outer edge that create a similar-looking tip to a belt that was cut with an English point punch. Finish off by covering the naked end with edge paint or a Sharpie.
But Wait… Add Conchos

Now, for those of you who want to add a little pizazz to your belt, let's talk about adding conchos. Wait… what's a concho?
Conchos are decorative metal pieces that you can attach to your belt to give it some extra flair and personality. They come in all sorts of shapes, sizes, and designs, from classic Western styles with cowboys and horses to more modern and abstract patterns.
Whether you want to add some bling to your outfit or just make a statement with your accessories, conchos are the way to go. Plus, they're super easy to attach - just divide your belt into equal sections, punch some holes, and screw or rivet those little beauties right onto your leather canvas.
Trust me, once you start adding conchos to your belts, you'll never want to wear a boring plain belt again!
For example, if you want to add 4 conchos to your belt, divide by 5. This ensures the conchos are at equal increments across your belt. Measure from the center of the screw farthest from the buckle, down to your first hole (the hole closest to the end of the belt that's opposite the buckle).
Lay out the conchos at equal distances from one another, then mark your belt at each concho. Punch holes using the revolving punch and use either a screw-back or rivet-back concho. If you use the screw-back, remember to add a little bit of white glue.
This will not seal it in permanently so you can change out the conchos whenever you want, but it will keep them from working themselves out over time. Truly the best of both worlds!
You're All Set

Congratulations, you know how to install a buckle to your belt blank! You now know how to add the perfect size holes and even some fancy conchos to your belt. Remember to measure twice, cut once, and have fun with it!
With this newfound skill, you can create belts that match your unique style and personality. Now, go ahead and show off your new belt to your friends and family. They'll be asking where you got it from and you can proudly say, "I made it myself!"


